A Step-by-Step Picture Guide
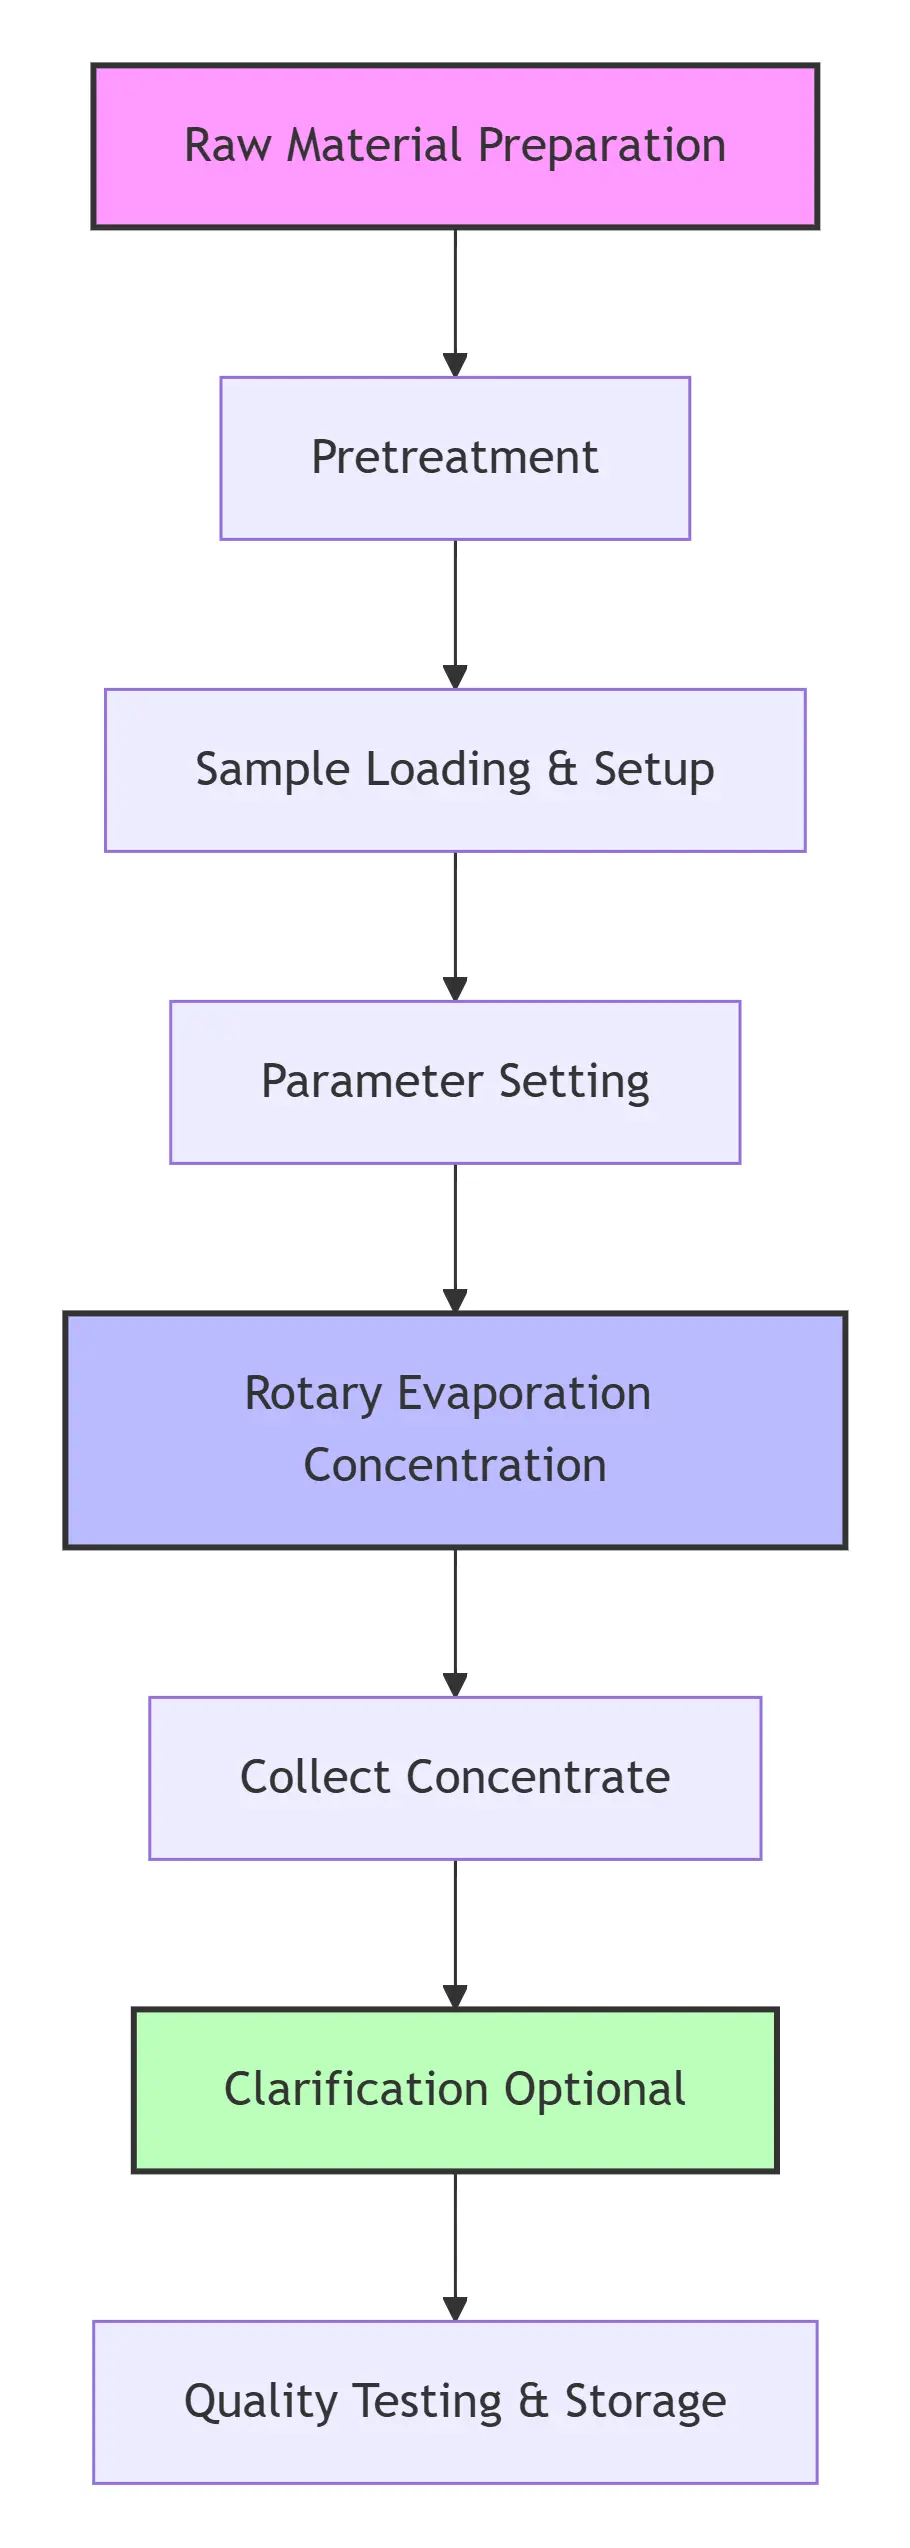
What You'll Actually Do Step by Step
Part 1: Getting the Orange Juice Ready Before the Rotovap

Things to Keep in Mind When Doing It:
Pick oranges that are fresh and ripe
Wash them well, take off the peel and seeds
Squeeze out the juice and strain it through a cheesecloth or mesh strainer to get rid of big pulp chunks
Part 2: Getting the Gear Ready and Putting the Juice In
Key Settings (Just Follow These):
| Setting | What to Do |
|---|
| How much liquid to use | No more than ½ to ⅔ of the flask's capacity |
| Cooling water temp | 0–5°C (chill it before you start) |
| Vacuum grease | Spread evenly on all joints to get a good seal |
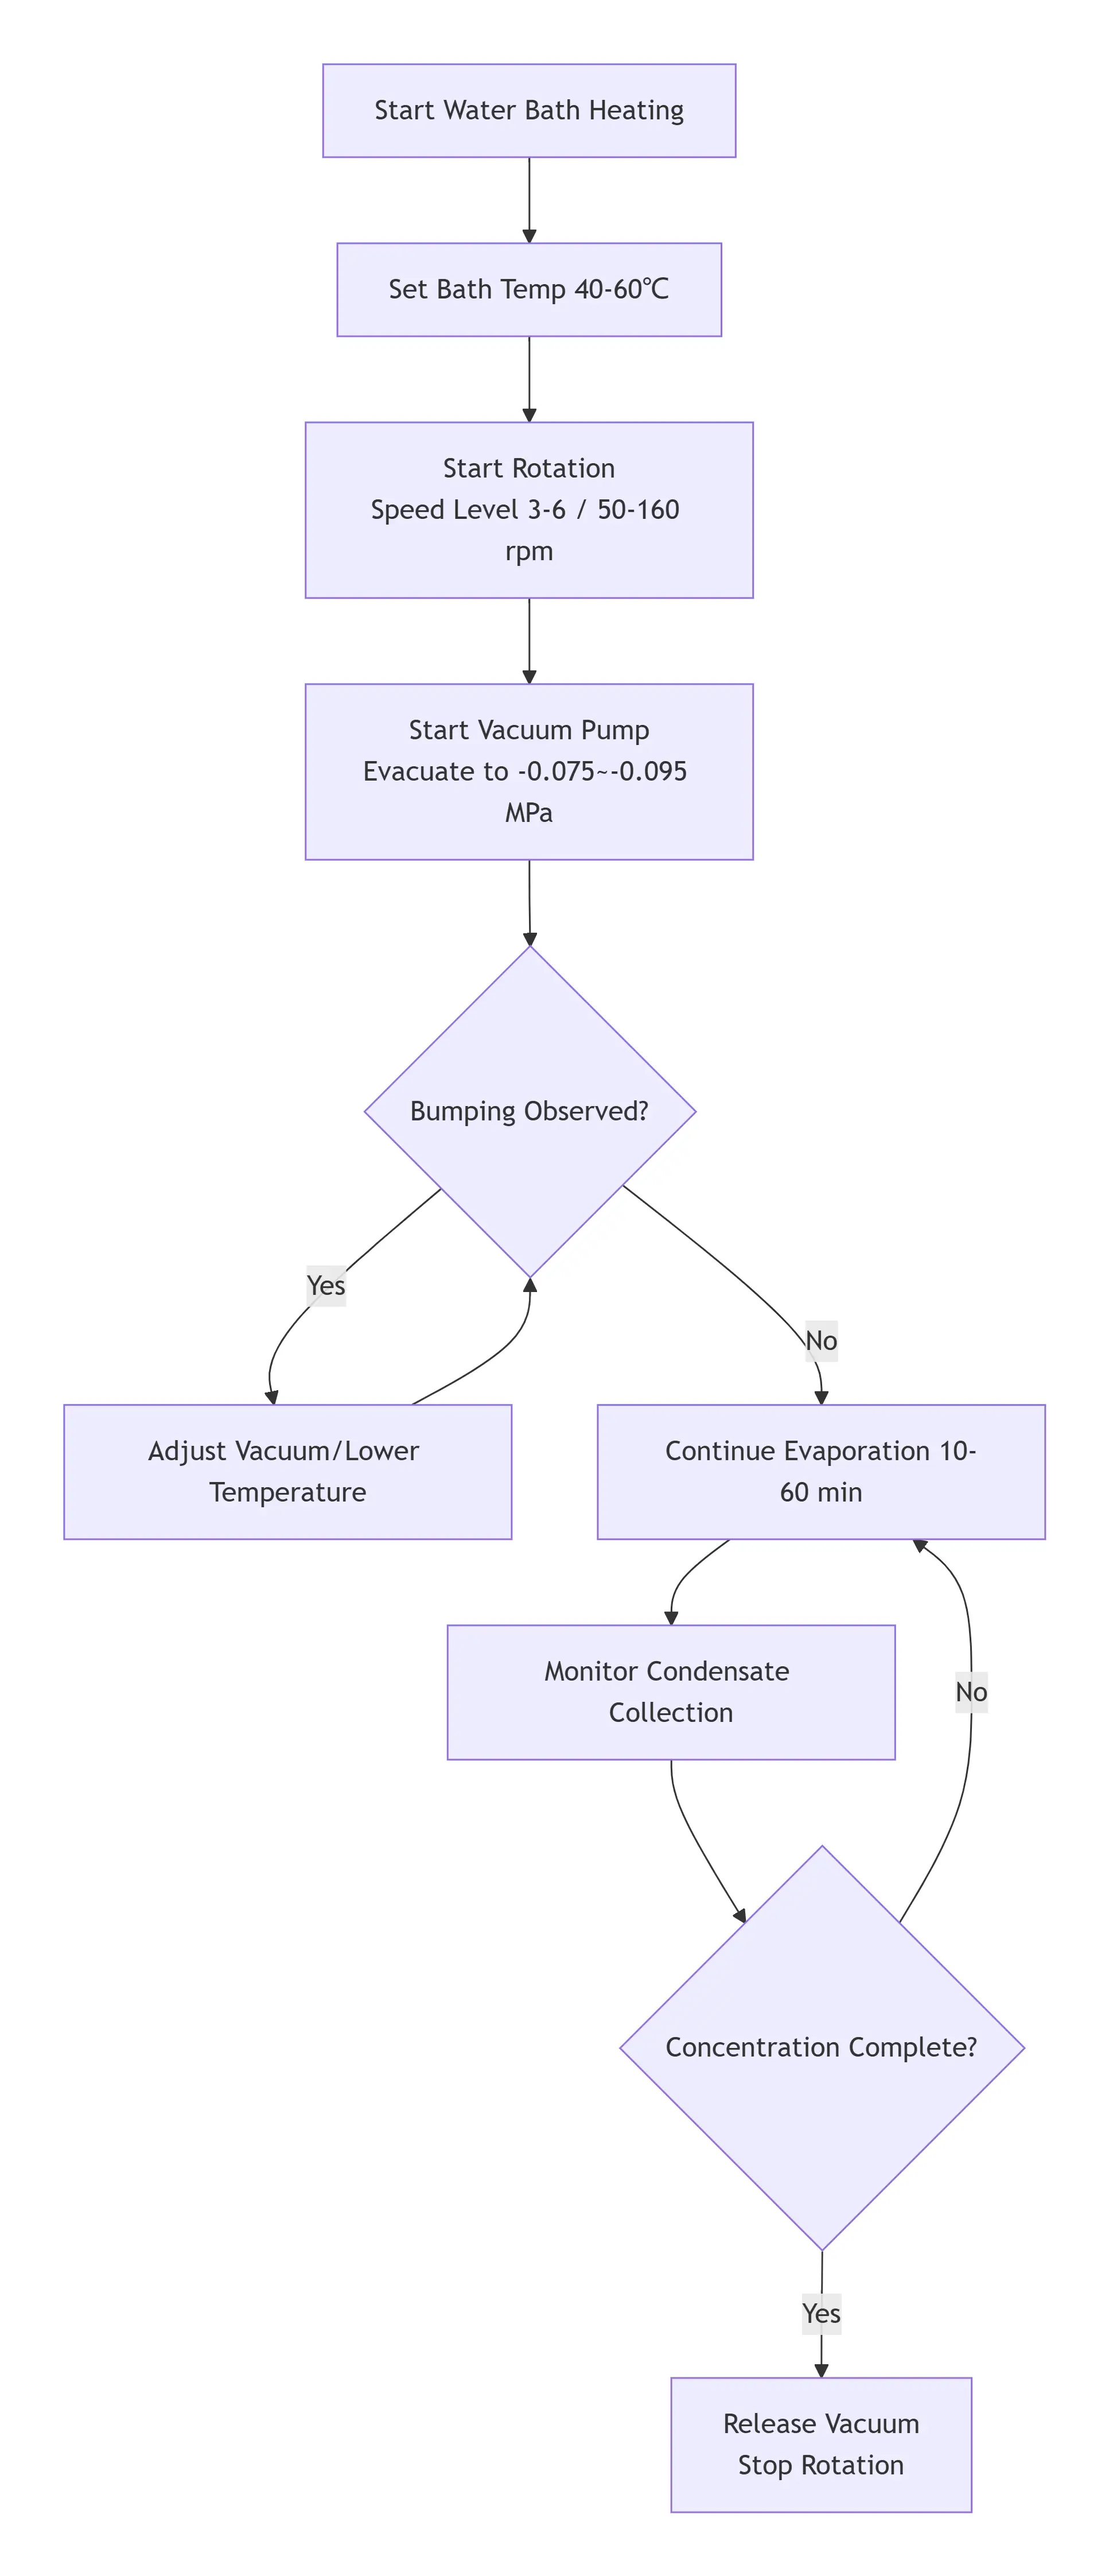
Phase 3: Running the Rotovap to Concentrate the Juice (The Main Steps)
Experimental Settings (based on lychee juice concentration patent data):
| Setting | What to Use | Why It Matters |
|---|
| Water Bath Temp | 40–60℃ | Low heat keeps good-for-you nutrients safe |
| Vacuum Level | –0.075 to –0.095 MPa | Strong vacuum makes liquid boil at lower temp |
| Rotation Speed | Level 3–6 (~50–160 rpm) | Spreads juice into a thin, even layer |
| Concentration Time | 10–60 min | Depends on how thick you want the juice |
| Cooling Temp | 0–5℃ | Helps vapors turn back into liquid fully |
Phase 4: Wrapping Up & Collecting Your Concentrate
Safety Tips:
⚠️ Must stop rotation BEFORE releasing vacuum (prevents flask detachment)
⚠️ Release vacuum slowly to avoid bumping and splashing
⚠️ Evaporating flask is hot - use heat-resistant gloves
Phase 5 (Optional): Clarification Treatment
For clear, transparent orange juice:
Heads-up: Pectinase breaks down pectin in the juice, giving you a clear, see‑through, and stable juice.
Quick Look at All the Experimental Settings
Phase Setting Best Range Why This Range
Pretreatment Mesh size 80–120 mesh Catches large bits
Water Bath Temperature 40–60℃ Protects delicate nutrients
Vacuum System Vacuum level –0.075 to –0.095 MPa Lowers boiling point
Rotation System Speed 50–160 rpm Makes a smooth, even film of juice
Cooling System Condenser temp 0–5℃ Grabs water vapor completely
Concentration Time 10–60 min Depends how thick you want it
Enzymolysis Pectinase 4000–7000 U/100g Clears up the juice
Enzymolysis Temp / Time 35–60℃ / 1–3 h Keeps enzyme working well
⚠️ Important Things to Watch Out For
Check glassware: Look for cracks before you start.
Good seal: Spread vacuum grease evenly on all joints so no air leaks in.
Cool first: Turn on the cooling circulator and let it reach 0–5℃ before evaporation.
Water bath safety: Fill the bath with water before heating – never heat it dry.
Avoid bumping: Watch closely at the beginning. If bumping happens, release vacuum right away and lower the temperature.
Start/stop order: Pull vacuum first, then start rotation. When stopping: stop rotation first, then release vacuum.
Clean up: Clean the evaporating flask and condenser right after the experiment.
What You Can Expect
What to Look For Typical Result
Concentration effect In 10–60 min, juice reduces to ⅓–⅕ of its original volume
Aroma retention Low‑temp vacuum running keeps that fresh orange smell
Clarity After pectinase treatment, the juice turns clear and see‑through
Note: The settings above mostly come from lychee juice concentration patents. Orange juice has similar water and sugar content, so you can use these numbers as is. Adjust temperature and time based on how the concentration actually goes in your run.
Wonderful! Share this Blog:

